

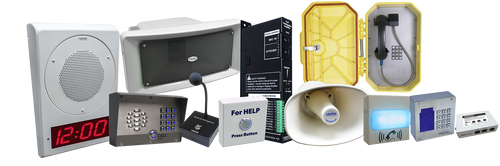

011154 Wall Mount Clock Kit - RAL 9003 (Signal White)
Part Number: 011154
MSRP: $374.00
- Description
- Features
- Specs
- FAQs
- Installation
- Downloads
*The Clock Kit/Speaker combo cannot support the Auxiliary RGB (Multi-Color) Strobe Kit.
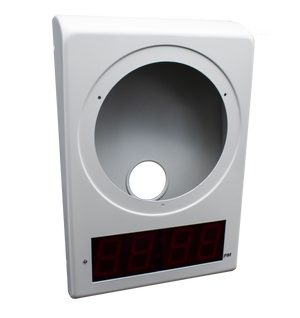
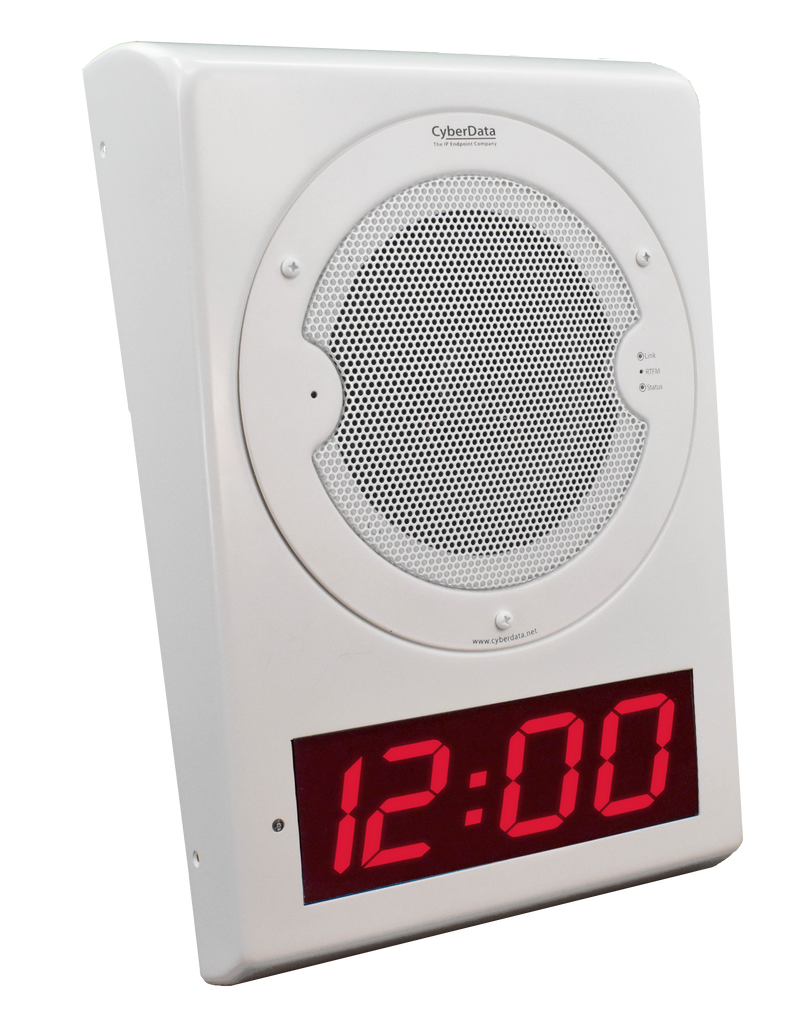
- Easy wall or ceiling installation
- Mounting kit included
- Electrogalvinized steel construction
- RoHS compliant
- Top and bottom cable channels
- 2.3-inch sized digits
- 12 or 24 hour format
- Auto ambient light adjustment
| Mounting kit | Yes |
| Material | Electrogalvanized Steel |
| RoHS Compliant | Yes |
| Time Source | NTP |
| Battery Backup | Yes |
| Dimensions | 15.8 in. [402 mm] L x 10.4 in. [264 mm] W x 4.0 in. [102 mm] D |
| Boxed Weight | 5.8 lbs. [2.63 kg] |
| Warranty | 2 Year Limited |
| Part Number/Color | 011154/RAL 9003 (Signal White) |
What dry wall mount enclosure do I need to use for the flush-mounted Clock Kit adapter?
Use the ATLAS FEST-18SC enclosure which is sold separately by ATLAS.
Do I need to do anything with my Clock kit before I install it?
Make sure JP1 is installed. This powers the Real Time Clock from the battery. If you do not install JP1, the clock will lose it's time when the power is disconnected.
I am unable to connect with the unit when it is plugged into a Cisco SLM 224P switch.
The cables or switch ports that you are connecting to are set in switch or hub mode instead of endpoint stations. The MDIX setting needs to be changed to MDI since our VoIP products are end stations. From the Cisco SLM 224P User Guide:
Change to MDI: MDI/MDIX displays the Media Dependent Interface (MDI) / Media Dependent Interface with Crossover (MDIX) status on the port. Hubs and switches are deliberately wired the opposite of the way end stations are wired, so that when a hub or switch is connected to an end station, a straight through Ethernet cable can be used, and the pairs are matched up properly. When two hubs or switches are connected to each other, or two end stations are connected to each other, a crossover cable is used to ensure that the correct pairs are connected. The possible field values are: MDIX
Use for hubs and switches. MDI Use for end stations.
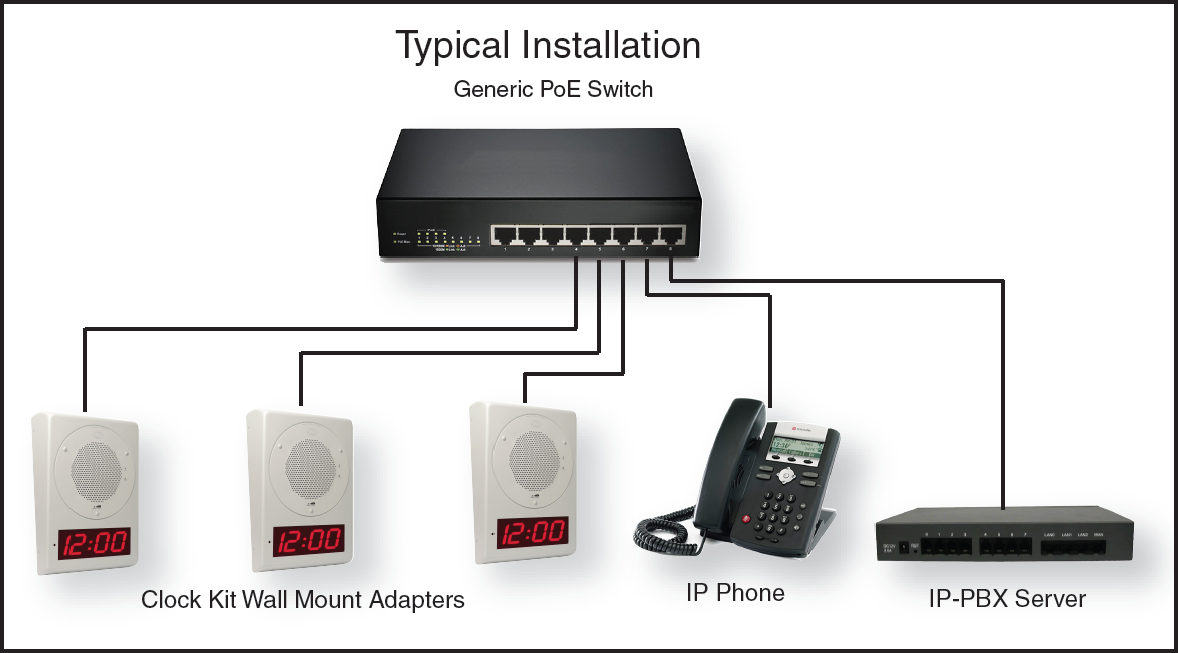
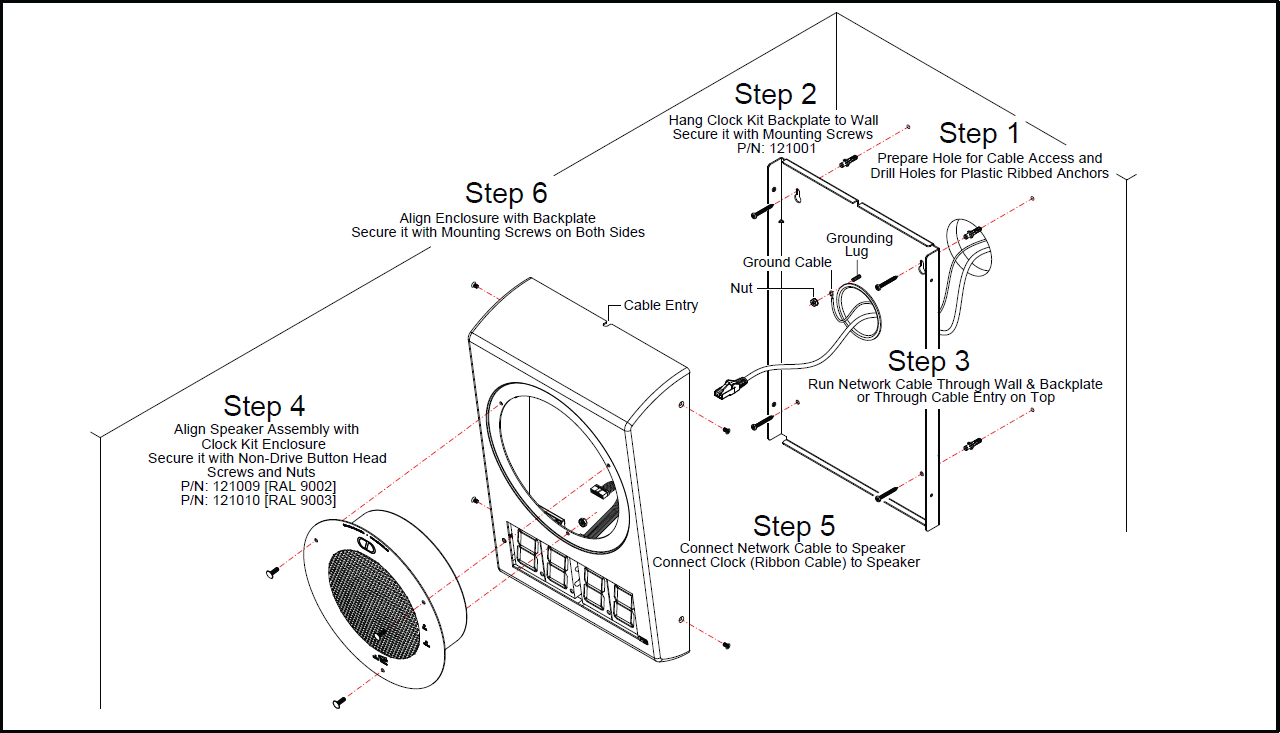
Typical Installation
Wall Mounting
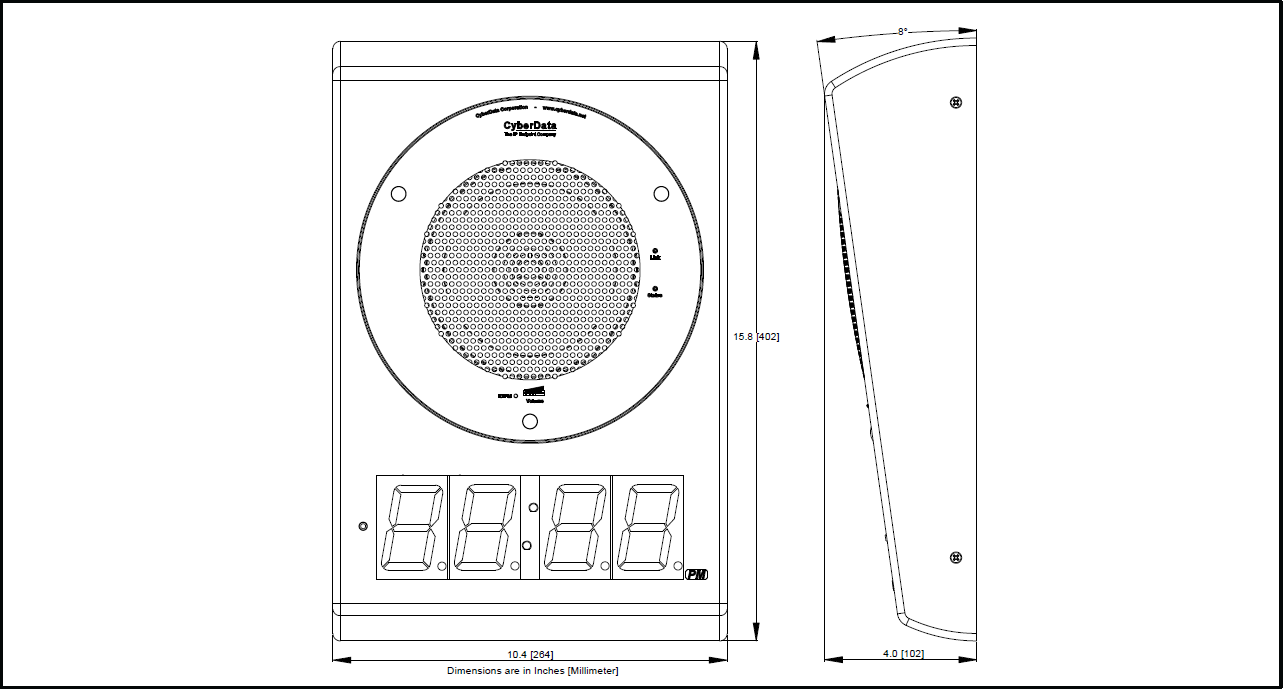
Dimensions
| Documentation | |
|---|---|
| Description | Date |
| PDF Datasheet | DATE:10/10/16 |
| PDF Quick Reference | DATE:6/7/19 |
| PDF Operations Guide | DATE:10/4/17 |
Description
*The Clock Kit/Speaker combo cannot support the Auxiliary RGB (Multi-Color) Strobe Kit.
Features
- Easy wall or ceiling installation
- Mounting kit included
- Electrogalvinized steel construction
- RoHS compliant
- Top and bottom cable channels
- 2.3-inch sized digits
- 12 or 24 hour format
- Auto ambient light adjustment
Specs
| Mounting kit | Yes |
| Material | Electrogalvanized Steel |
| RoHS Compliant | Yes |
| Time Source | NTP |
| Battery Backup | Yes |
| Dimensions | 15.8 in. [402 mm] L x 10.4 in. [264 mm] W x 4.0 in. [102 mm] D |
| Boxed Weight | 5.8 lbs. [2.63 kg] |
| Warranty | 2 Year Limited |
| Part Number/Color | 011154/RAL 9003 (Signal White) |
FAQs
What dry wall mount enclosure do I need to use for the flush-mounted Clock Kit adapter?
Use the ATLAS FEST-18SC enclosure which is sold separately by ATLAS.
Do I need to do anything with my Clock kit before I install it?
Make sure JP1 is installed. This powers the Real Time Clock from the battery. If you do not install JP1, the clock will lose it's time when the power is disconnected.
I am unable to connect with the unit when it is plugged into a Cisco SLM 224P switch.
The cables or switch ports that you are connecting to are set in switch or hub mode instead of endpoint stations. The MDIX setting needs to be changed to MDI since our VoIP products are end stations. From the Cisco SLM 224P User Guide:
Change to MDI: MDI/MDIX displays the Media Dependent Interface (MDI) / Media Dependent Interface with Crossover (MDIX) status on the port. Hubs and switches are deliberately wired the opposite of the way end stations are wired, so that when a hub or switch is connected to an end station, a straight through Ethernet cable can be used, and the pairs are matched up properly. When two hubs or switches are connected to each other, or two end stations are connected to each other, a crossover cable is used to ensure that the correct pairs are connected. The possible field values are: MDIX
Use for hubs and switches. MDI Use for end stations.
Installation
Typical Installation
Wall Mounting
Dimensions
Downloads
| Documentation | |
|---|---|
| Description | Date |
| PDF Datasheet | DATE:10/10/16 |
| PDF Quick Reference | DATE:6/7/19 |
| PDF Operations Guide | DATE:10/4/17 |